Understanding Print Specifications
Before diving into design, familiarise yourself with the specific print requirements. These can vary based on the product but generally include dimensions, bleed, resolution, colour format, and file type. Communicating with your print provider early can save time and prevent errors.
- Dimensions: Know the size of your final printed piece. Include trim lines if your design extends to the edge.
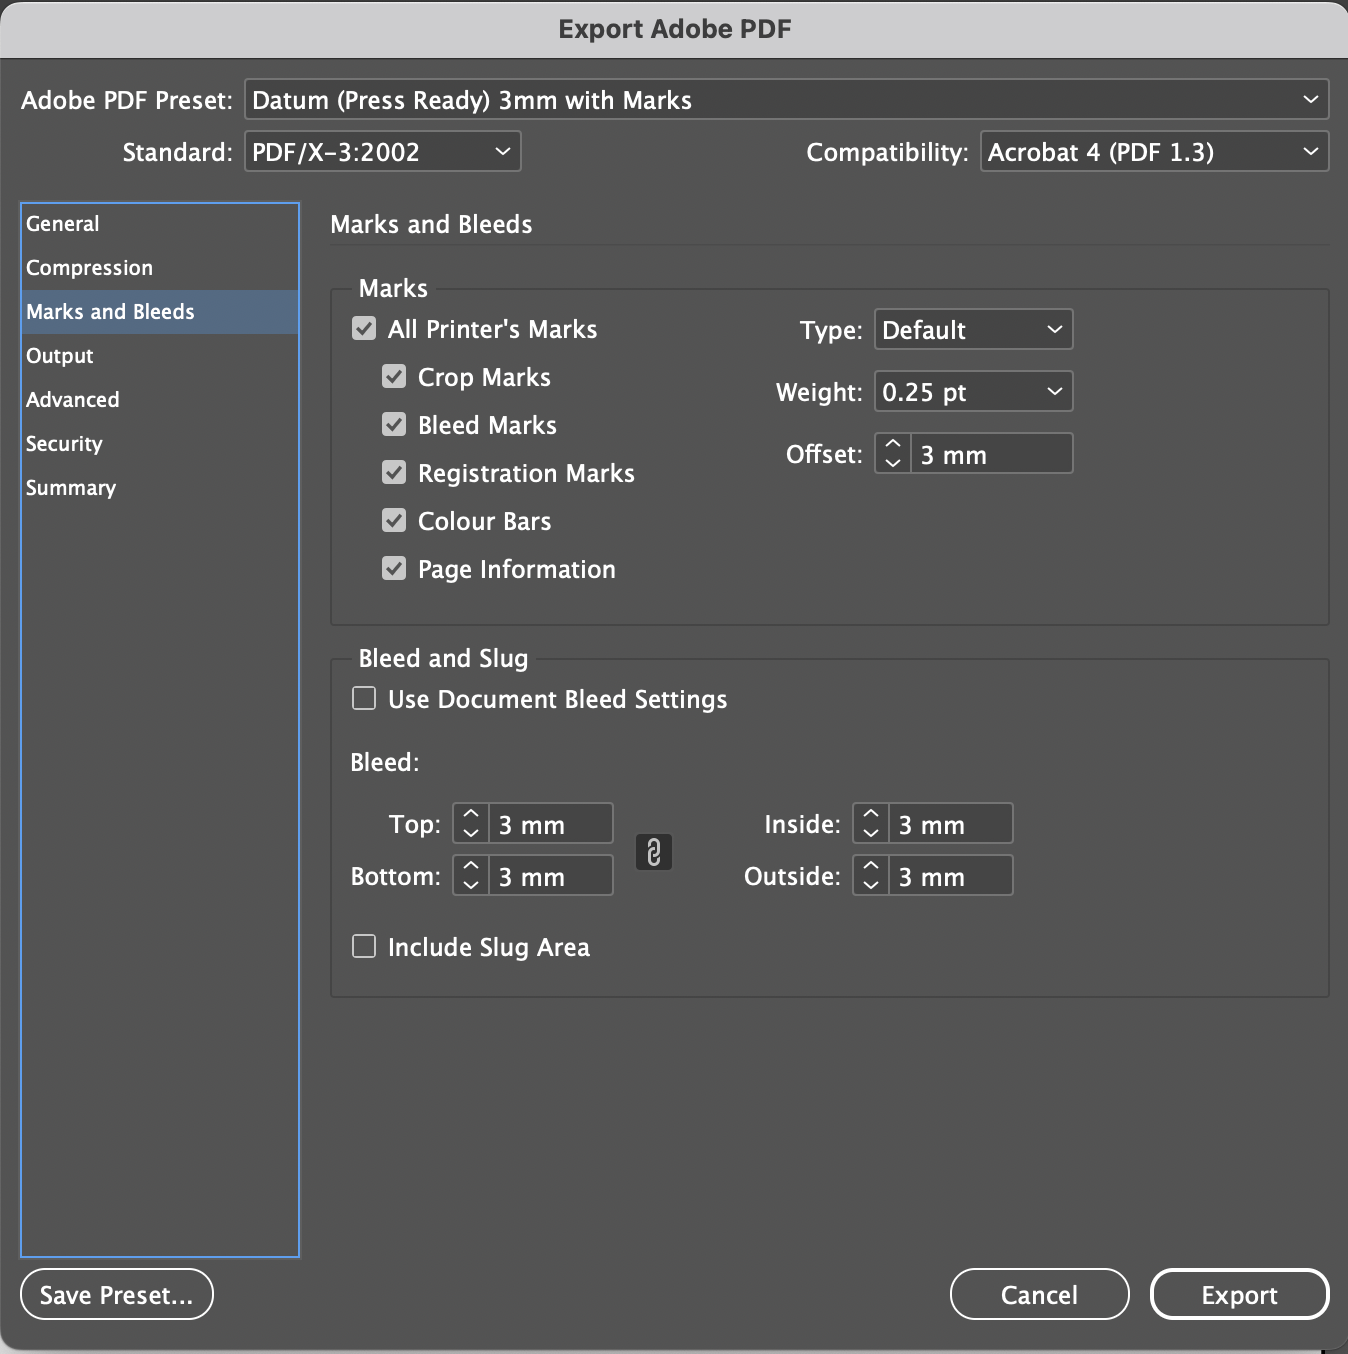
- Bleed: Extend your design slightly beyond the page borders to avoid white edges after trimming. A standard bleed is 3mm on each side.
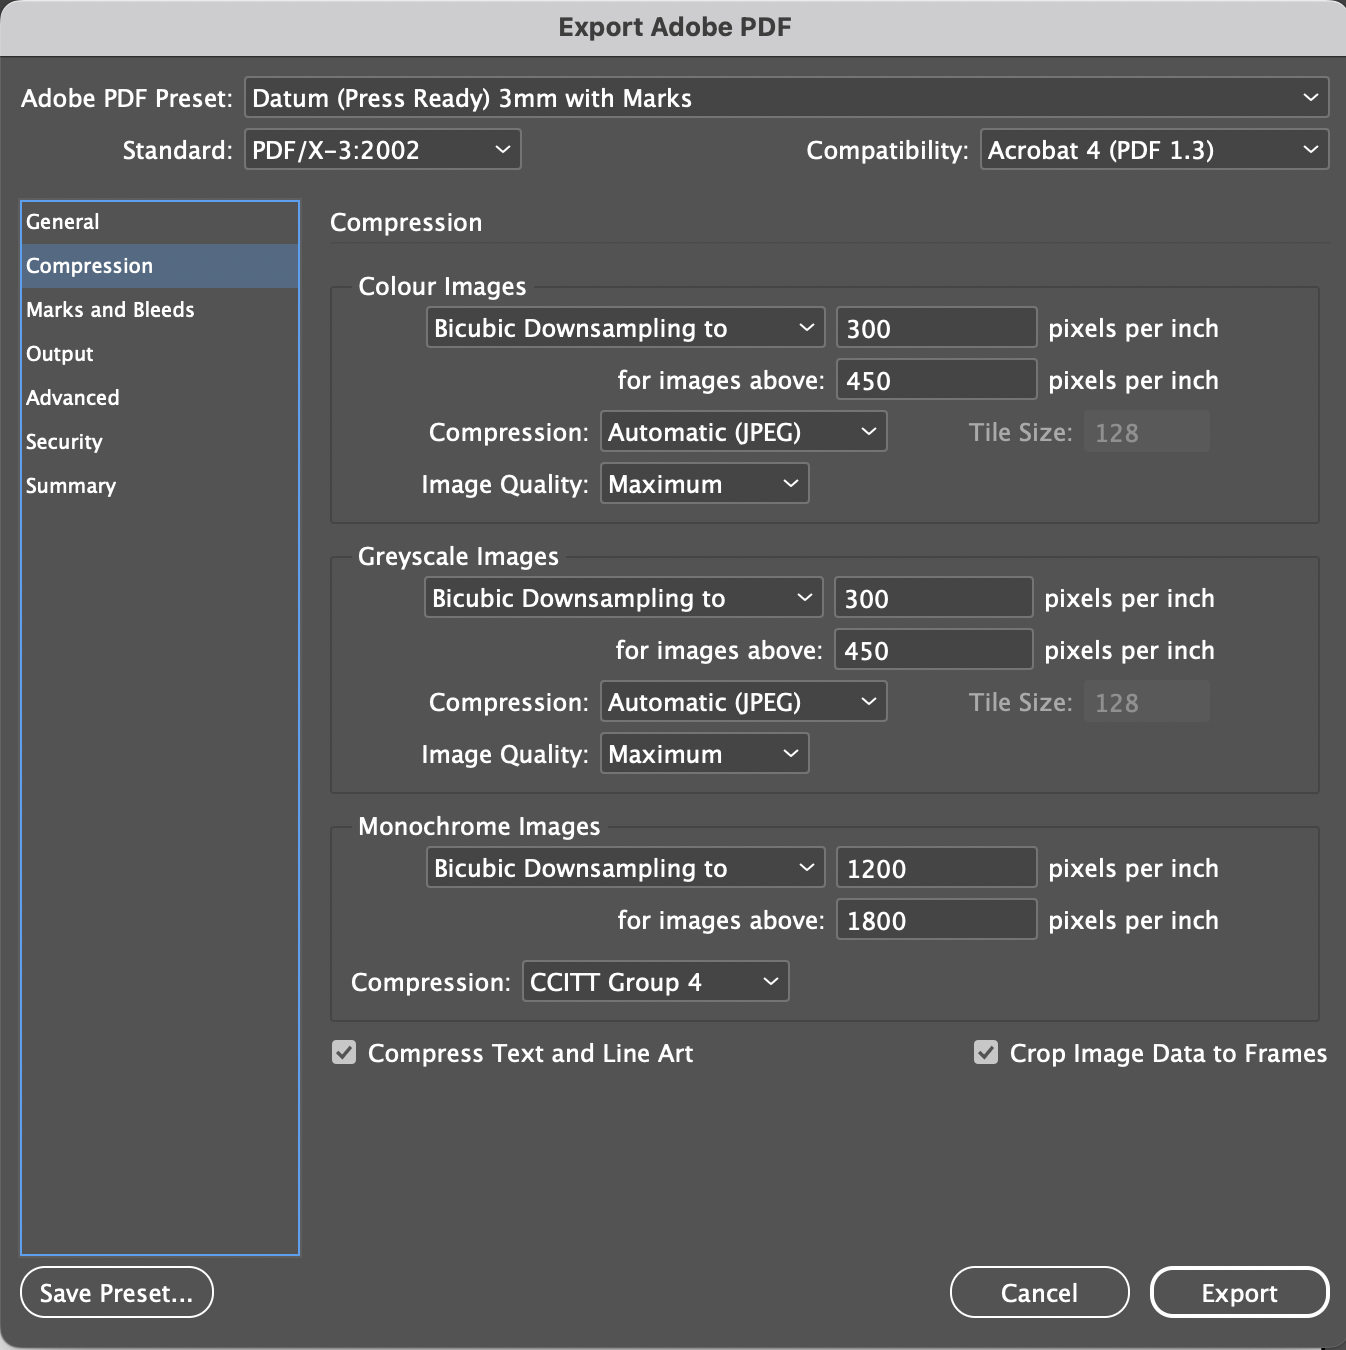
- Resolution: Ensure your images are 300 DPI (dots per inch) for clear, sharp printing.
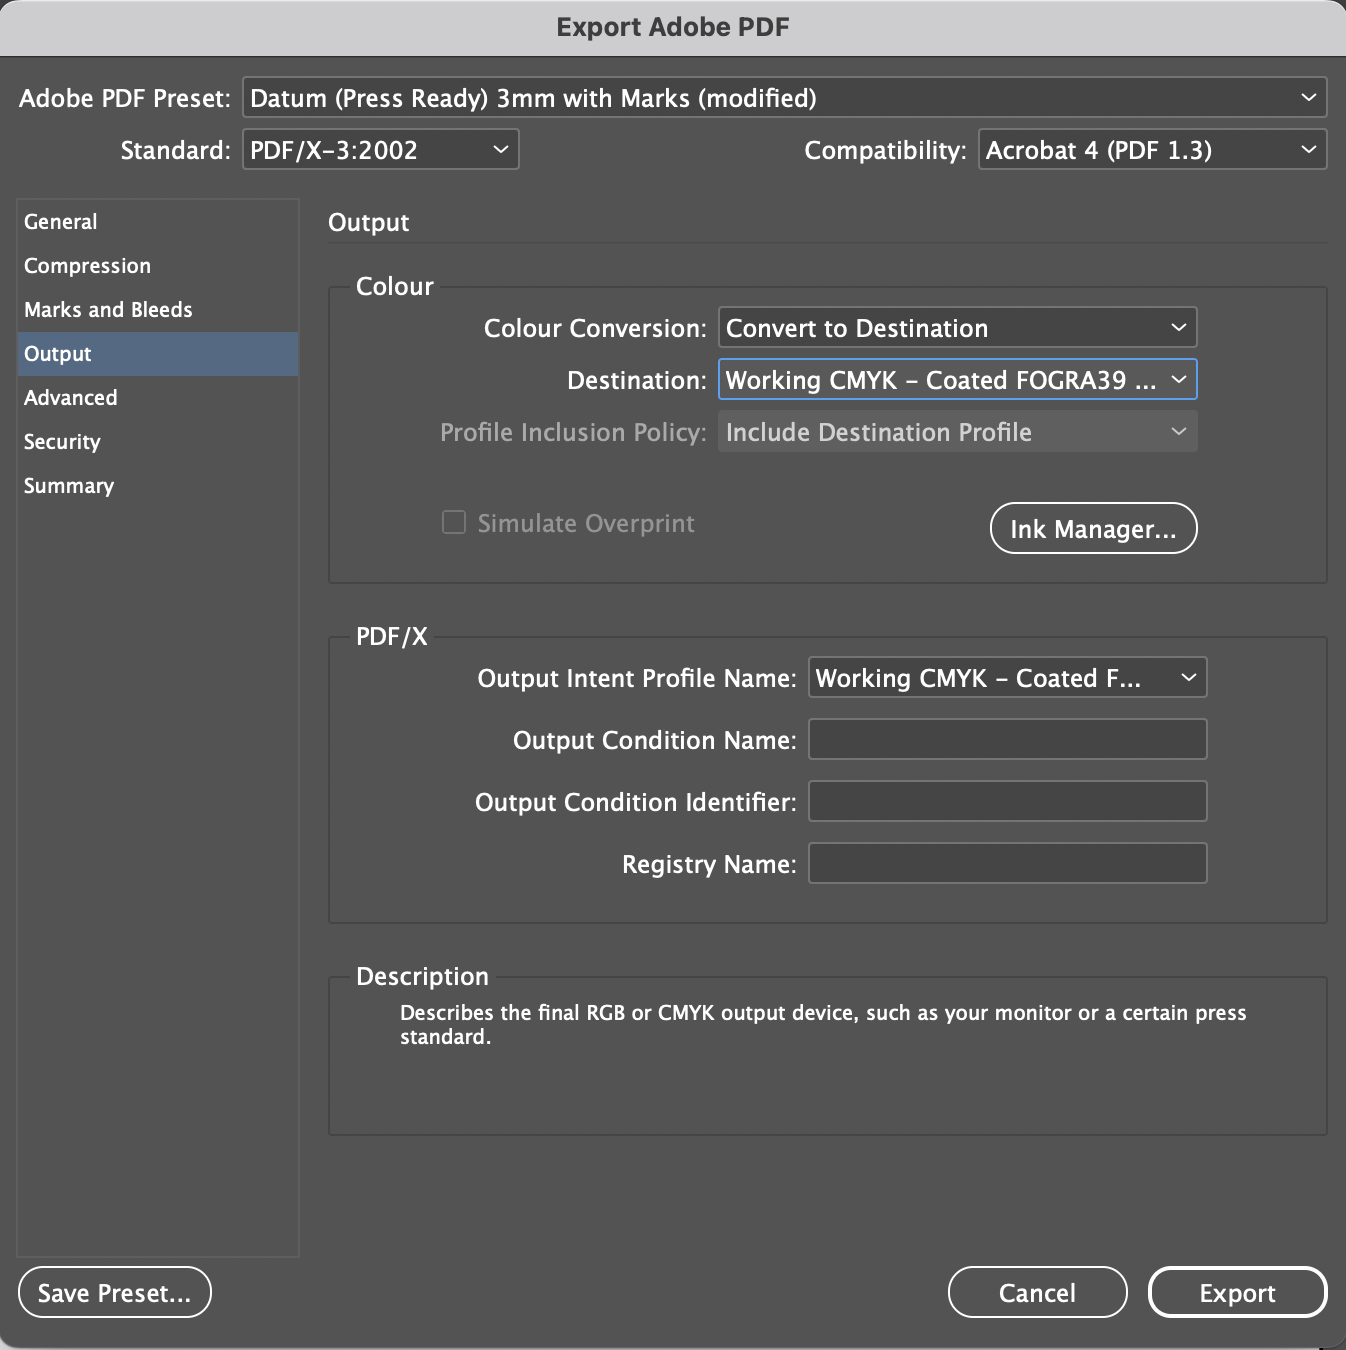
- Colour Format: Use CMYK (Cyan, Magenta, Yellow, Key/Black) colour mode instead of RGB (Red, Green, Blue) to match the print colour process.
- File Type: PDFs are widely accepted and reliable for printing, retaining all design elements as intended.
Step-by-Step File Setup
- Start with the Right Software: Design software like Adobe InDesign, Illustrator, or Photoshop offers the best control over layout, resolution, and colour settings.
- Set Document to Actual Size: Create your document at the final size you want it printed, considering bleed and trim areas.
- Apply Bleed Settings: Add a 3mm bleed around your document’s edges to ensure no unprinted edges occur after trimming.
- Use High-Resolution Images: Ensure all photographs and graphics are 300 DPI to avoid pixelation in the final print.
- Convert to CMYK Colour Mode: Switch from RGB to CMYK to reflect the colour processing of printers accurately.
- Implement Fonts Wisely: Use high-quality, legible fonts and ensure all text is embedded or outlined to prevent font substitutions.
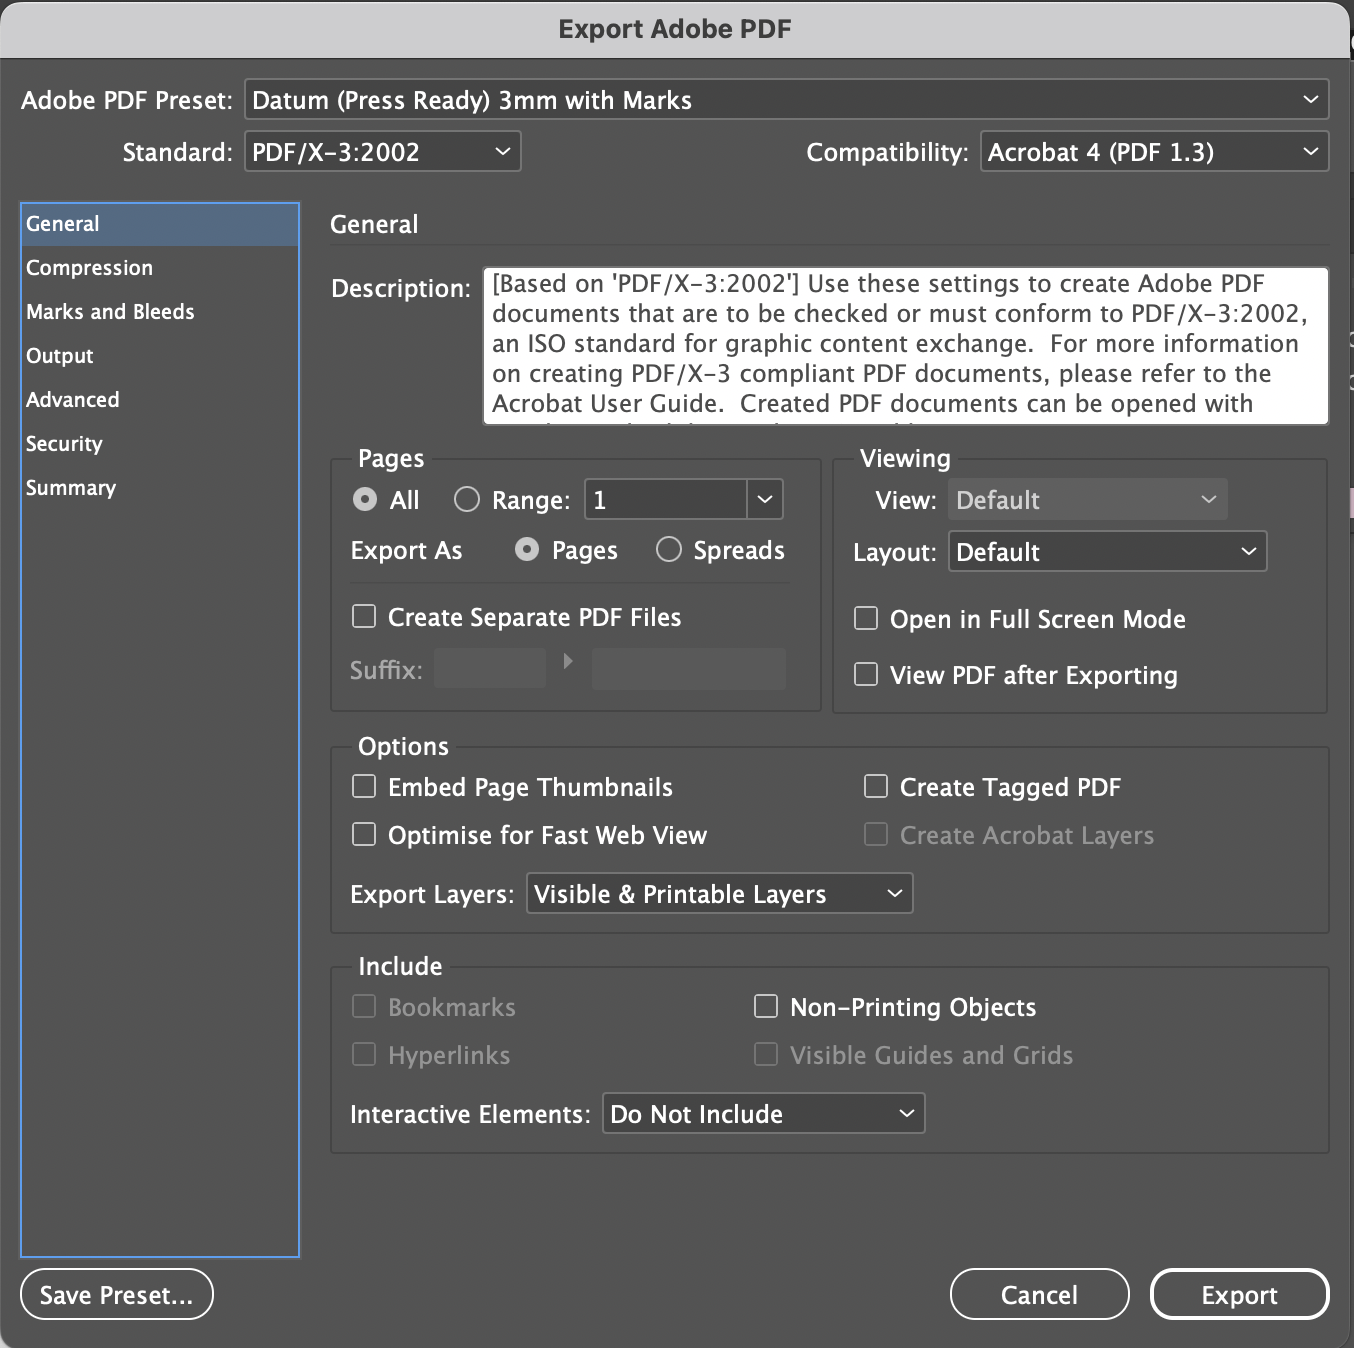
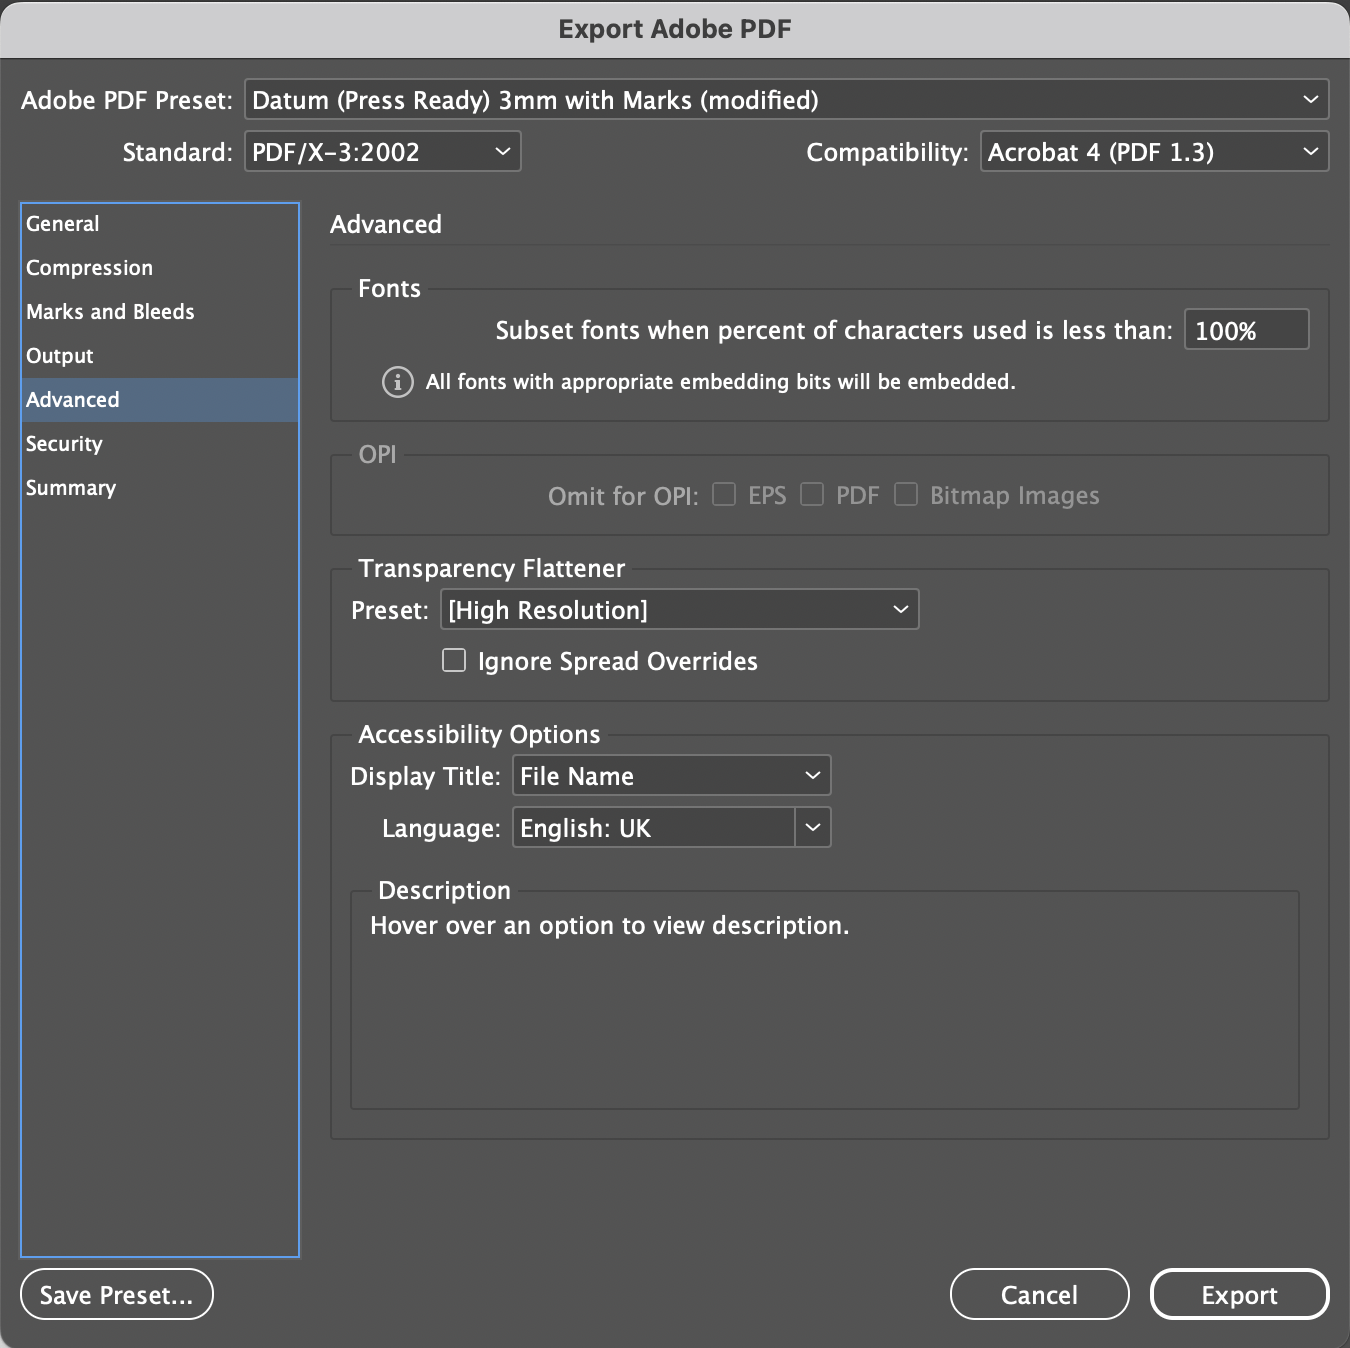
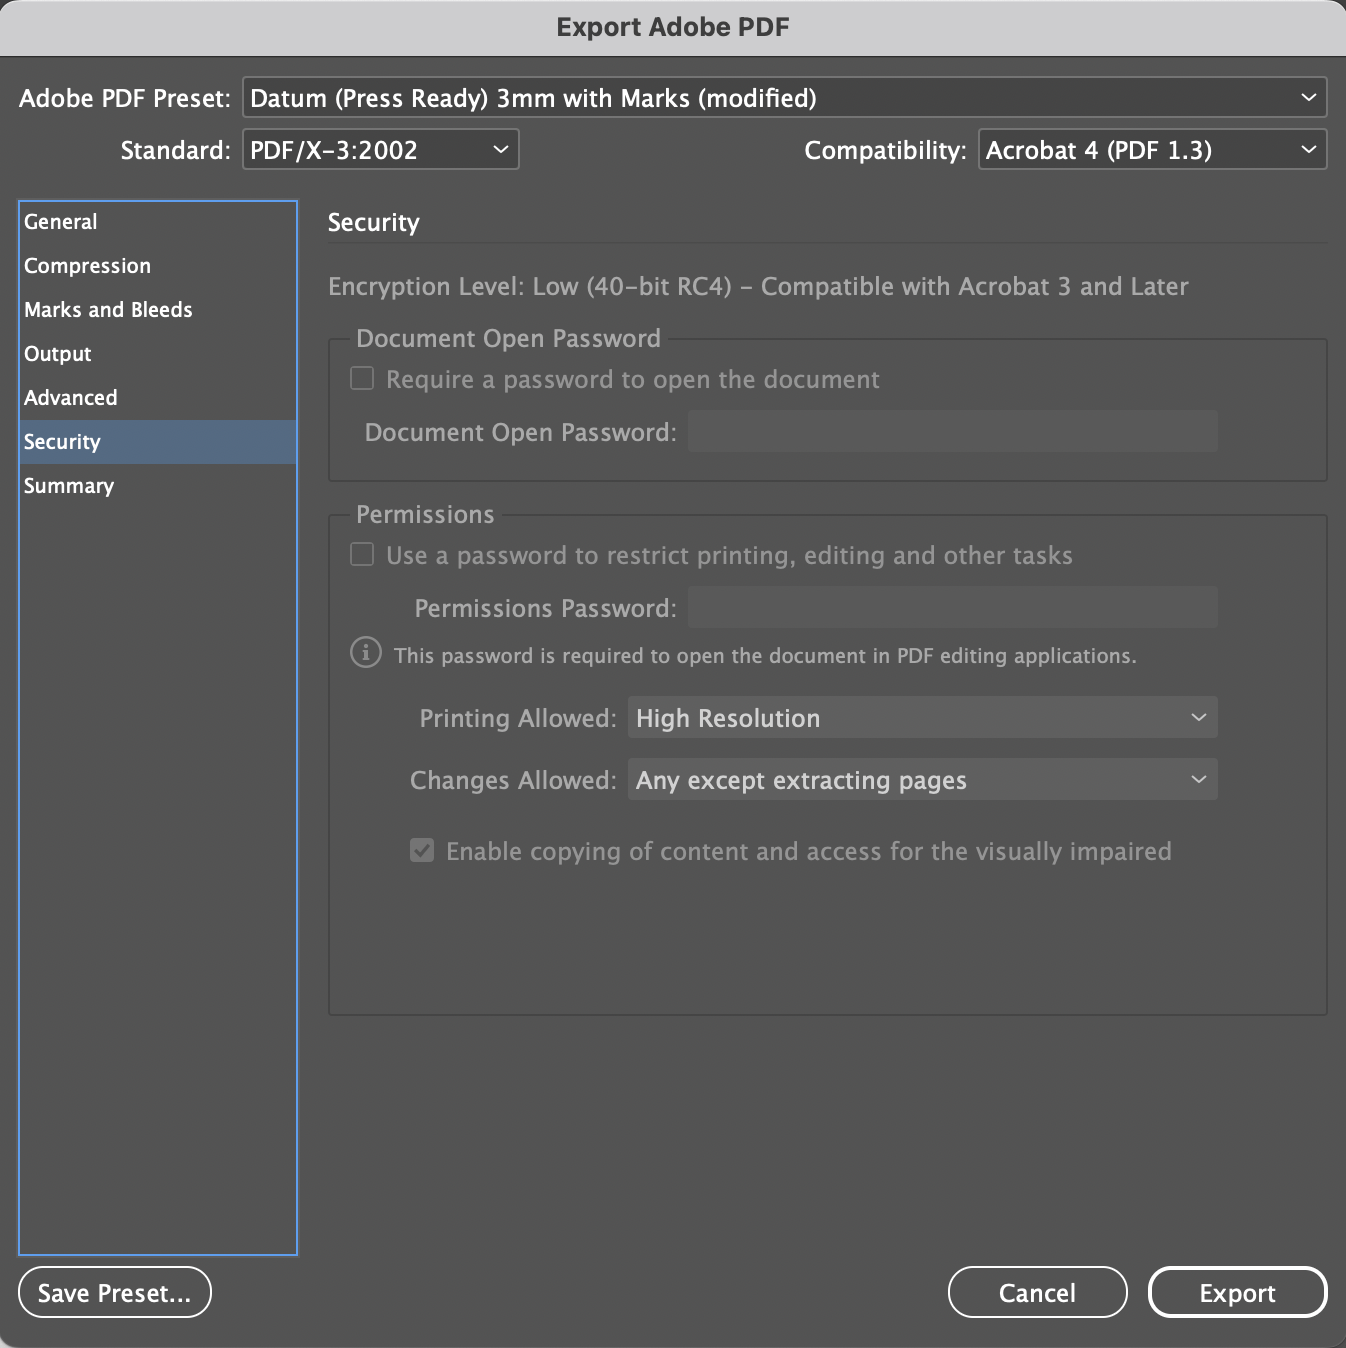
- Save as PDF with Proper Settings: Save your file as a PDF with ‘Press Quality’ settings, including bleed marks and all necessary printer’s marks.
Pre-Print Checks
- Proofread: Double-check text for spelling, grammar, and punctuation errors.
- Colour Accuracy: Review colour accuracy, especially if brand colours are involved. Consider a printed proof to check colours in real life.
- Cross-Check with Datum: Before final submission, confirm your file meets our requirements.
Setting up files for print requires attention to detail and an understanding of the print process. By following these steps, you can ensure your printed materials reflect the quality and professionalism of your design. Remember, communication with your print provider is key to a successful print job.
PDF Export Settings